Foundation Repair – Signs to Look For

Foundation Repair Greensboro NC is essential to protect your home. Whether you have minor cracks, bowing walls, or sinking and uneven floors, timely repairs are necessary to avoid further damage.

Foundation Repair

It’s important to hire a contractor with extensive experience. Cheaper fixes like poly foam, mud jacking, and concrete pilings can offer quick results but do not last.

When cracks in your home’s foundation appear, it’s vital to distinguish between those that are normal and those that indicate structural problems. Observe gaps for signs that they’re getting worse; uneven floors, sticking doors and windows, and water infiltration can all point to shifting soil or moisture issues. Small vertical cracks that run straight up and down are normal and don’t usually indicate significant problems unless they grow wider. Cracks accompanied by other symptoms should prompt a professional inspection.

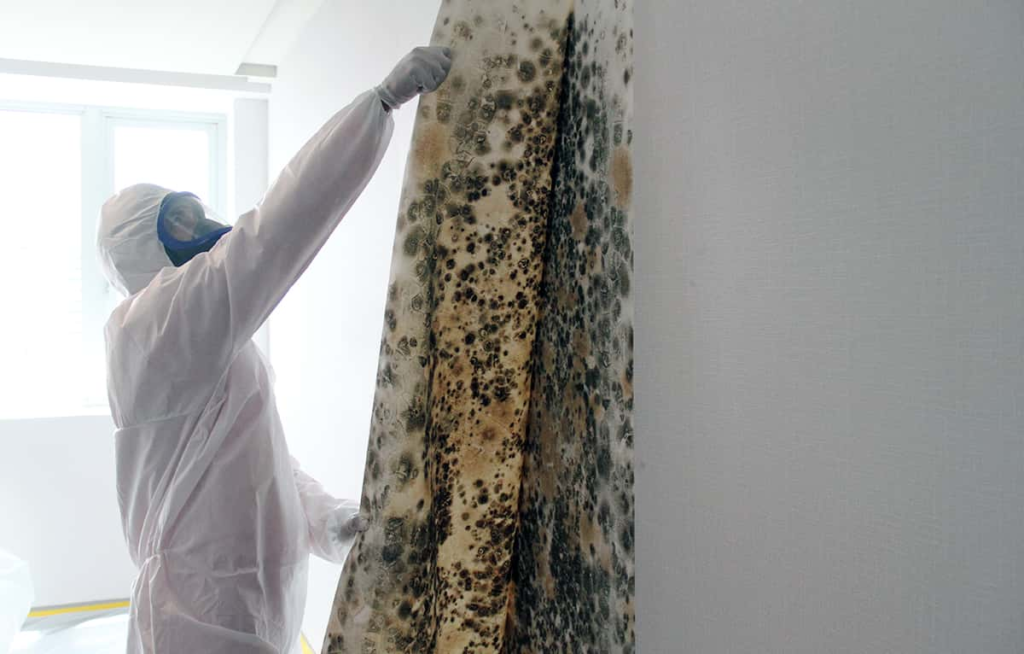
Horizontal or jagged diagonal cracks are a sign of increased pressure on the foundation walls, and they can indicate serious structural issues that require immediate attention. Widening gaps around doors and windows are also cause for concern. These gaps allow moisture and pests to enter the basement, which can lead to mold growth and costly repairs.

Foundation cracks can be repaired with a variety of solutions, depending on the severity and root causes of the problem. Epoxy injections can repair minor cracks, carbon fiber reinforcement can stabilize larger ones, underpinning prevents future settling, and waterproofing guards against water damage.

Regular maintenance can also help prevent and repair foundation cracks. Ensure that gutters and downspouts are directing water away from the foundation, and grade the soil so it slopes at least five feet away from the house. This prevents water from pooling near the foundation and causing soil erosion, which can put pressure on the walls.

Leaking Pipes

A leaking pipe in your foundation is more than a nuisance; it can cause serious damage to your home over time. This is particularly true if the leak goes undetected for months or even years, as it can weaken the soil supporting the foundation, leading to slab movement, cracks, and structural instability.

Leaks under the foundation are hard to spot, and even professional plumbers have a hard time finding them. They can result from a variety of causes, including aging pipes, poor installation, and natural shifts in the ground underneath your home. Some signs of a leak are wet spots or warm floors, high water bills, and a foul odor caused by mold or mildew.

When a pipe under the foundation is damaged, it usually starts as a pinhole in the copper, and this small hole only gets bigger over time. This allows gallons of water to leak out, and the longer this is allowed to happen, the more damage it can do to the foundation. Fortunately, these kinds of leaks can be prevented by having proper drainage around your foundation. This includes making sure that the soil slopes away from your home, and that gutters and downspouts are clear so they can direct water away from the foundation.

A leaking pipe can be fixed with several different methods, depending on your needs and the amount of damage that has already occurred. These include spot repair, where a section of flooring and concrete is removed to access the damaged pipe, which can be patched or replaced. Another option is epoxy pipe coating, where a thin layer of resin seals small cracks and leaks without cutting into the slab. Finally, a complete home repipe is possible for some homes, in which the old pipes are replaced with newer PEX or copper tubes.

Shifting Soil

The soil in your home provides a crucial layer of support that allows the structure to bear weight and pressure. When this layer is weakened, it can damage the foundation. Instabilities in the soil are often caused by erosion and poor construction practices. However, a number of preventative measures can help to keep soil shifting under control.

The main culprit for soil shifting is moisture, and it’s important to monitor soil moisture levels. If the soil gets too wet, it can weaken and shift under the house. The opposite is also true – dry soil can shrink and cause the foundation to settle unevenly. In addition to monitoring soil moisture, homeowners can take steps to improve drainage, maintain landscaping, and consider professional soil testing.

Shifting soil can cause problems such as bowed walls, cracks around doors and windows, and floors that buckle. It’s important to report these issues to a foundation repair company immediately to minimize further damage and restore the functionality of your home.

Foundation damage isn’t just unsightly, it can impact your quality of life and even threaten the value of your home. If you have any questions about foundation repairs or want to learn more about preventative techniques, contact a reputable foundation repair specialist today. They can assess your home’s condition and recommend the best course of action for your budget. The sooner you address foundation issues, the more you can save in the long run.

Cracked Walls

The good news is that not all wall cracks are structurally significant. A small hairline crack in a concrete foundation wall can be due to shrinkage during the concrete curing process and isn’t typically a cause for concern. However, cracks that are wider than an eighth of an inch are a warning sign that it’s time to call in the professionals for an inspection. Cracks that are growing over time should also be treated as a sign of serious ongoing issues that require immediate attention.

If the cracks in your foundation walls are horizontal or diagonal, they may be caused by shifting soils putting pressure on your home’s foundation. Likewise, if your foundation walls are tilting in at the bottom or pushing in at the top, it’s important to seek expert help as quickly as possible.

In addition to the underlying causes of foundation cracks, poor-quality materials and shoddy construction can contribute to the development of these cracks as well. Periodic structural inspections conducted by foundation experts can help identify these material-related problems before they lead to major damage.

Fortunately, there are effective solutions for repairing cracks in foundation walls. These include epoxy injection, carbon fiber straps, underpinning, and waterproofing. Each solution is tailored to the severity and root cause of your specific foundation cracks. Injection seals minor cracks, carbon fiber stabilizes bowing walls, underpinning prevents future settling and movement, and waterproofing guards against water infiltration. In combination, these solutions provide a comprehensive approach to restoring and fortifying your foundation. For more information, contact us today for a free, no-obligation estimate. We look forward to assisting you!

Uneven Floors

Uneven floors are a common problem in older homes that can be a sign of foundational shifts, settling, or crawl space moisture issues. Ignoring uneven flooring will only make it worse, so homeowners should take action as soon as they notice the problem. Creaking or squeaking sounds and gaps forming between the floor and baseboards are common indicators of sloping or uneven floors that require professional attention.

Before building contractors lay a foundation, they typically compact the soil underneath where the foundation will sit. However, this process is not always completed correctly, causing the ground to move over time and cause shifts in the foundation. When the foundation settles, it will usually sink into the surrounding soil, dragging parts of the flooring up or down along with it. This can lead to uneven floors that are difficult to correct.

The most common cause of uneven floors is water damage from plumbing leaks or excessive moisture in the foundation’s crawl space. This moisture causes the clay soil to expand and contract, which can destabilize the foundation and lead to sloping or sagging floors. This type of unevenness is most commonly seen in concrete slab foundations.

In some cases, uneven floors can be addressed with shims or sanding, but these quick fixes do not address the underlying problems that are causing your floor to sink or rise. Instead, it’s recommended that you contact a foundation repair expert to inspect your home and suggest the most appropriate repair solution for your uneven floors. A qualified repair specialist can use precise foundation repair methods like pier systems to re-level the floors and ensure they stay even in the future.

Cabinet Refinishing – A Cost-Effective and Quick Way to Modernize Your Cabinets

San Jose Cabinet Refinishing is a cost-effective and quick way to modernize your cabinets. For best results, avoid using harsh chemicals or abrasives on your cabinets, as these can damage the finish and cause discoloration.

Cabinet Refinishing

This method is less expensive and more environmentally friendly than replacing your existing cabinets. It also minimizes dust and mess, making it a safer option for the rest of your home.

Proper cabinet painting preparation ensures that your cabinets will receive a long-lasting, smooth finish. It is an important step that should not be skipped, as doing so may result in peeling paint or uneven surfaces. When properly completed, however, cabinet painting preparation results in a flawless makeover that you will love.

When preparing your cabinets for painting, the first step is to remove all hardware from your doors and drawers. This will allow you to work more efficiently and minimize any potential mess and damage. It is also a good idea to move any items that you want to keep out of the way to a different area of your home, such as a garage or a closet. This will prevent them from being affected by the painting process and prevent you from having to re-hang any pieces afterward.

After removing the hardware, you will need to clean the cabinets thoroughly with a degreaser and scuff sand any areas that are showing signs of wear. This will help the primer and later coats of paint to adhere correctly. It is also a good idea to purchase a special cabinet-grade primer, as it will be better able to withstand wear and tear than regular paint.

Next, you will need to sand the cabinet surfaces lightly to create a smooth, even surface. This will also help the new stain or paint to adhere properly. It is also a good idea to repair any scratches, dents, or blemishes at this point. Once the sanding is complete, you will need to apply a coat of primer to the cabinet surfaces. Let this dry completely before moving on to the staining or painting steps.

A cabinet refacing project is more extensive than a refinishing job, as it involves replacing the cabinet doors and drawer fronts while leaving the existing cabinet boxes intact. This is a great option if you are looking for a more drastic change in your kitchen’s look. However, if you are looking for a more cost-effective and less time-consuming solution, refinishing is the best choice.

Staining

Cabinet refinishing is a great option for homeowners who want to upgrade their kitchen without spending the money to buy and install new cabinets. The process involves stripping the old cabinet doors and drawer fronts, repairing any damage, and staining them to give them a fresh look. Refinishing can be done on wood or engineered wood products such as medium-density fiberboard (MDF).

First, the cabinet surfaces must be cleaned to remove dirt and grease buildup. Mix a solution of trisodium phosphate (TSP) or a similar deep cleaner with degreasing properties in warm water and dip a clean cloth into it, then wipe down the cabinet surfaces, paying particular attention to areas near handles and knobs where grease tends to collect. Allow the surface to dry completely before proceeding.

Next, the cabinets must be sanded to prepare them for staining. Using 220-grit sandpaper on a sanding block, sand all flat surfaces of the cabinet doors and drawer fronts, as well as any textured or molded areas. Make sure to sand with the grain of the wood. Then vacuum the area to remove any sanding dust. After sanding, the cabinets should be lightly wiped down with a damp rag to remove any remaining debris.

Once the cabinets have been wiped down, apply one or more coats of stain to achieve the desired color and finish. It is important to apply the stain in even, thin layers, and allow it to dry between coats. Depending on the type of wood used and your preference, you may need to apply additional coats of stain to darken the finish.

When the stain is completely dry, it is a good idea to apply a polyurethane top coat to seal in the stain and protect it from normal wear and tear. It is important to follow the product instructions carefully, as the stain will likely need several hours to fully cure.

Refinishing your cabinets can be a challenging DIY project, but with proper preparation and practice it is possible to achieve professional-quality results. If you are unsure about how to tackle the project, consider working with a professional cabinet refinishing company instead. Not only will they save you time, but they will also ensure a high-quality finish that will last for years to come.

Painting

Cabinet painting is a great way to refresh your kitchen’s look and can even increase your home’s value. However, there are many steps involved in the process that must be taken carefully to ensure that your paint job looks good and lasts. A quality cabinet paint job requires proper surface preparation and a high-quality product. Without the right skills and knowledge, you may find yourself dealing with chipping or peeling paint in a short period of time.

A good starting point is to clean your cabinets with a degreaser such as TSP or another degreasing agent. This will help to remove any grease or grime that has built up on the surfaces of your cabinets, and can make a huge difference in the outcome of your cabinet painting project. After cleaning, it’s important to scuff sand the surfaces of your cabinets before priming. This will help to remove any sheen and prepare the surface for a smooth finish. After sanding, it’s important to wipe down the cabinets with a damp cloth to remove any dust and dirt from the surface.

Once the primer is applied, it’s a good idea to wait for it to dry completely before moving on to the actual painting. This will help to prevent any bleeding or flaking. Once the primer has dried, it’s a good idea to sand the cabinet surface again and wipe down any areas that are chipping or uneven. This will create a smooth surface for your paint and help to ensure that your paint adheres well.

After the cabinets are painted, it’s a good idea to allow them to dry completely before installing any hardware. This will help to prevent any damage or chips during the installation process. Finally, it’s a good idea to label your cabinet doors and drawer fronts before beginning the refinishing process. This will make it easier for you to return them to the correct place when the refinishing is complete.

Refinishing can be done as a DIY project, but it’s not an easy task and is best left to professionals who have the expertise to ensure a professional-looking result that will stand up to years of holiday feasts, family chaos, and weekday stress. If you’re considering updating your cabinets, contact us to see how we can transform your space.

Cleaning

Whether your cabinets are painted or stained, it’s important to regularly clean them. Over time, dust and grease accumulates on cabinet surfaces and can cause long-term damage if not removed properly. In addition, dirt and grime can clog scrubbing pads or scratch the finish of painted cabinets. Regular cleaning helps prevent these problems, making your cabinets look like new for years to come.

Avoid the Mistake of Using Harsh Cleaners

In an effort to remove stubborn stains or food residue, some homeowners may use too much pressure when scrubbing their cabinets. Aggressive scrubbing can damage the surface, leaving worn spots and scratches that can be difficult (if not impossible) to repair. Using a soft sponge and a mild dish soap diluted with water is usually sufficient for routine cleaning. For tougher stains, a paste made of baking soda and water can help break down grease without damaging the stain.

Some homeowners rely on wax- or silicone-based products to add shine and protect their cabinets. These products can actually cause long-term damage to your cabinets by attracting dust, allowing moisture to seep in, and creating an unsightly buildup on the cabinet’s surface. If you have been using these products, it’s important to remove them before starting your cabinet refinishing project.

Many homeowners also make the mistake of overusing caulking on their cabinets, which can leave a sticky residue and lead to mold or mildew growth. Caulking should be used sparingly and wiped down regularly with a damp cloth.

If you have white cabinets, it’s also a good idea to use a solution of one part white vinegar and two parts water to wipe down the surfaces. Vinegar is a natural cleaner and can help prevent the formation of mildew or mold.

Mold Removal – What You Need to Know

Mold is a common household problem that can be hard to eliminate. It grows as a fungus that thrives in moist conditions.

The spores you see are the fruiting bodies of this fungus. Luckily, by addressing the root cause, it is possible to kill the mold and prevent it from coming back. Contact Mold Removal In Brooklyn now!

Moisture is the key ingredient for mold growth, so you must fix whatever is causing it to clean up the problem. That can be as simple as fixing a leaking pipe or as complicated as tearing down and replacing walls, insulation, and flooring. It would be best if you also cleaned the affected areas and replaced any items that can’t be washed or re-used. A professional restoration service may be necessary if you have a serious mold problem.

Before you begin to clean, however, it’s important to protect yourself from the spores that are released during mold removal. The EPA recommends wearing rubber gloves, goggles and a mask that is labeled N95.

Once you have your protective gear on and have identified the source of moisture, it’s time to start cleaning the moldy area. Start by wiping the mold with a damp cloth or sponge. Rinse the cloth or sponge often and continue scrubbing until you can no longer see or smell the mold. Be sure to scrub porous surfaces like drywall and wood, as well as rugs and carpeting, to remove any hidden spores.

If the spores persist, spray them with a commercial mold killer such as chlorine bleach or distilled white vinegar, and wipe again. The acetic acid in the vinegar will kill the remaining mold spores and make it impossible for them to grow back.

After you have cleaned all the surfaces that can be safely cleaned, set out dehumidifiers and fans to dry the areas for three days. After that, test the area by sight and smell for any new mold growth. If you can’t find any, it’s safe to use your home again.

In many cases, a few splotches of surface mold can be a warning sign that there is an ongoing water or humidity problem that needs to be addressed. For severe mold problems, a professional remediation company should be used to ensure the fungus is completely removed and that the moisture issue has been resolved. They can repair any damaged areas and help you get your home or business back to normal as quickly as possible.

Cleaning the Surfaces

After a thorough inspection, the next step is to clean any areas where mold has grown. This process should always begin with removing the source of moisture, as well as addressing any building materials affected by the water intrusion or mold. Mold spores can also spread to other areas of the home, so addressing the root cause of the problem is important.

After the area has been cleaned, it is essential to thoroughly ventilate the space to avoid re-infection with mold spores. This can be done by opening windows and running fans. The use of a deodorizer can help to get rid of any musty odors caused by the mold growth. The last step is to replace any materials that have been permanently damaged or contaminated by the mold.

Depending on the type of mold you are dealing with, different cleaning methods may be necessary. For example, black mold (Stachybotrys) is typically very toxic and requires a professional to remove. This type of mold tends to grow in moist, dark areas, such as inside walls or under floors.

The best approach to cleaning mold is to remove any visible growth and resurface the area with a suitable coating, such as epoxy paint. This will prevent the mold from growing back and provide a healthy environment. For surfaces with stubborn stains, a mixture of vinegar and hydrogen peroxide can be used to effectively kill the mold and remove the stain.

When cleaning moldy surfaces, it is important to wear personal protective equipment, including a face mask with vent holes, rubber gloves and goggles. This will prevent any mold spores from getting in your eyes or on your skin, and it will also protect you from any burns or irritation from cleaning solutions.

For most areas, a good scrub brush, rubbing alcohol, water and detergent can be used to effectively clean the surface of any impacted areas. After scrubbing, it is important to rinse the surface and dry completely, as mold spores thrive in wet environments. It is also a good idea to wash your clothes and shoes after working in an area with mold, as they will likely carry the spores in and out of the house.

Cleaning the Air

Mold spores are everywhere in our homes and are constantly dispersed in the air. When we breathe in these spores, our lungs can absorb them, which causes allergies and other respiratory issues. For this reason, it’s important to remove all sources of mold spores from the environment, including those that have not yet grown into visible colonies.

Mold removal starts with identifying and removing the source of moisture that has allowed the mold to grow. Once that is done, the affected area can be cleaned and sanitized. When cleaning a moldy surface, it is important to use only non-toxic cleaners as some types of mold are toxic to humans. Non-toxic cleaners typically consist of white vinegar and water in a spray bottle or bucket. This mixture is sprayed or applied directly onto the moldy surface and scrubbed vigorously using a brush with a long handle. The contaminated surfaces should then be rinsed with clean water and thoroughly dried to prevent further mold growth.

Porous materials, such as drywall and ceiling tiles, should be discarded if they cannot be fully cleaned and disinfected. For these surfaces, it is essential to wear a mask, rubber gloves and goggles during the clean-up process to protect yourself from mold spores that may become airborne.

It is also a good idea to test an area of suspected mold to ensure it is actually mold and not mildew. This can be done by dipping a cotton swab in diluted bleach and swiping the area. If the spot lightens after a minute or two, it is likely that you are dealing with some form of mold and not mildew.

If you are concerned that your house has a problem with mold, you should consult an expert for a professional assessment and evaluation of the damage. If the extent of the mold is severe, it is best to call in a professional to avoid any further damage and to ensure the safety and health of your family and pets. Exposure to some types of mold, such as cladosporium and stachybotrys chartarum, can cause allergy symptoms like sneezing, coughing and shortness of breath in humans and can result in serious lung diseases in animals.

Final Inspection

Mold is a type of fungus that thrives in damp areas. It can be found in many places, including outside on grass clippings or on food in a refrigerator (such as green cheese). But it isn’t always harmless and may cause health problems, especially for those with certain allergies or compromised immune systems. There are even a few types of mold that are toxic. One such example is Stachybotrys chartarum, commonly called “toxic black mold.” Mold spores can trigger allergy and respiratory reactions. They can also irritate skin, trigger headaches, and cause memory loss and concentration problems.

The most important step in any mold remediation process is removing the mold and addressing the moisture problem that caused it to grow. If the underlying issue is not fixed, the mold will likely return and could continue to grow and destroy other surfaces.

Once the mold and spores are gone, a professional inspector will conduct a final inspection of the affected area. He or she will test the air to ensure the humidity level is back to normal. The professional will also check to see if the walls and floors are dry. If they are still wet, the professional will use dryers and fans to speed up the drying process.

Any contaminated items will be bagged, sealed, and disposed of in accordance with EPA standards. The inspector will then sanitize all surfaces with a bleach solution. He or she will wipe down the surfaces with a sanitizing brush and then sanitize the tools used to clean the surface with a disinfectant. This is a vital step, as touching or jostling the moldy surface can release more spores into the air and make the situation worse.

Once the surface is clean, construction services can begin to rebuild the area. Occupants should be informed of the mold problem and any construction that will take place in the space. Upon request, they should be given a copy of any inspection or testing reports. Once the space has been cleared for reconstruction, the mold restoration company can issue a certificate of clearance.

Dental Implants Explained by Your Implant Dentist

Implant Dentist Las Vegas are a long-term commitment to your oral and overall health. During the treatment planning phase, we will review your medical history and take X-rays to determine the status of your bone.

Dental Implants

If your jaw has a minimal amount of bone, we can perform a small graft to add more bone to the area. After this heals, we can place your implant post and abutment.

Dental implants are a permanent replacement for missing teeth. They offer the closest thing to natural tooth structure available in modern dentistry, and can restore a patient’s smile without affecting neighboring teeth. Implants are also the only restoration option that maintains and stimulates bone growth, keeping jawbones from shrinking. The treatment is safe when performed by a qualified and experienced surgeon or dentist.

People who have lost teeth due to gum disease, injury or as the result of a medical condition may qualify for dental implants. They can be used to replace single teeth, multiple teeth or even all of the upper and lower teeth in a jaw.

Before starting the implant process, your dentist will do a full exam of your mouth including X-rays and 3D images of your teeth and jawbones. This will help them determine if the amount of healthy bone remains to support an implant, which is vital. If there is not enough healthy bone, a special bone graft can be done to build up the area and create a strong foundation for the restoration.

The next step involves surgery to place the implant. During the procedure, your oral surgeon will make a cut to open the gum and drill holes into the bone where the titanium implant metal post (the equivalent of a tooth’s root) will be placed. The site is covered by a healing cap and given time to heal.

The implant will fuse to the bone, a process known as osseointegration. Once the healing is complete, a temporary abutment can be attached to the implant so that your dentist can create a crown. Once the new crown is attached to the abutment, it will be hard to tell the difference between your natural teeth and your implant.

How Does a Dental Implant Work?

Dental implants are titanium posts which act like artificial tooth roots to hold and support fixed (permanent) or removable replacement teeth that look, feel, and function like natural teeth. They can replace single or multiple missing teeth without affecting surrounding teeth or gums. The implant process takes several months and can be complicated, but it’s worth the wait for a permanent solution to missing or damaged teeth.

To prepare for the surgery, your dentist will take a medical history and give you a comprehensive dental exam. They will also do a panoramic x-ray and 3D CT scan of your mouth. This helps them determine if you have sufficient jawbone to support an implant and if there are any other issues that need to be addressed.

During the implant procedure, your oral surgeon will make an incision in your gum to expose the bone and then use a series of drills to create and enlarge a site (called an osteotomy) for the implant metal post. They will then place the implant. If necessary, they will perform a bone graft before placing the implant to add more bone to deficient areas.

Once the implant is in place, your gums will be sutured and allowed to heal. During the healing process, your implant will fuse with the jawbone in a process called osseointegration. It is a critical step in ensuring the longevity of your implant and avoiding potential problems.

Once the implant is fully healed, your dentist will place a connector on the implant called an abutment. They will then attach an artificial tooth on top of the abutment for a natural-looking result. It is essential to maintain a healthy oral environment after the surgery, which includes regular brushing and flossing as well as professional cleanings.

What Are the Advantages of a Dental Implant?

Dental implants are a great way to replace missing teeth. They are strong and durable, and with good oral hygiene, they can last a lifetime. They also look and function like your natural teeth. They can improve your appearance by filling in empty spaces and preventing the facial sagging that occurs when teeth are missing for an extended period of time.

They help to maintain bone density by mimicking the root structure of your natural teeth. The implant post anchors into the jawbone and stimulates it, reducing bone loss in the area of the missing tooth.

In addition, they can prevent nearby teeth from shifting out of place, a condition called TMJ (temporomandibular joint) syndrome. They can also improve your ability to chew and eat foods properly, which can help with digestion. Lastly, they can restore your speech clarity by filling in gaps caused by missing teeth.

One disadvantage of dental implants is that they may interfere with your sinuses, which are air-filled cavities located above the jawbone. If the implant posts are placed in the upper jaw, they can cause inflammation and congestion of the sinuses, known as sinusitis. The condition usually resolves on its own once the implant heals, but in some cases, you might need treatment from a doctor or ear, nose, and throat specialist.

Another downside of dental implants is that they require significant financial investment and a commitment to meticulous at-home care. They are not a good fit for people who smoke, and they can aggravate existing oral health problems. If you are interested in dental implants, it is important to see an implant dentist for a consultation and discuss your options.

How Much Does a Dental Implant Cost?

As with most dental procedures, the cost of a dental implant can vary from person to person. Factors that affect cost include the location of your dental practice, the expertise of the dentist and the type of materials used for the implant body and abutment. Generally, titanium is the most affordable material for implants, although zirconia implants are also available for a slightly higher price. The number of implants required will also affect the cost.

In addition, certain preparation procedures can increase the initial investment. For example, if you need to have a bone graft done before the implant procedure, this will add to the overall cost of the treatment. And if you require additional work, like having your gum line reshaped to make room for the artificial tooth, this will also increase the total cost of the implant.

Another factor that will influence the cost is whether or not your dental insurance covers the procedure. Most dental insurance providers consider implants to be a cosmetic treatment and therefore will not cover the entire expense of the surgery. However, they may still pay for some of the prep work involved in getting the implants placed.

The good news is that there are many different ways to help pay for the cost of dental implants. Besides using funds in your health savings or flexible spending account (FSA) to reduce your out-of-pocket costs, there are also healthcare financing options, like CareCredit. These plans work similarly to loans but without a credit check and typically have a lower interest rate. You can also speak with your dentist about in-house payment plans that will allow you to spread out the cost of the implant over time.

Are Dental Implants Affordable?

Many patients worry about the cost of dental implants, but it is important to remember that they are a long-term investment in your health. Dental implants offer the most natural-looking, feeling, and functioning tooth replacement available today and will last a lifetime when cared for properly. They are also much more affordable than other tooth replacement options such as dentures and bridges.

The cost of a dental implant depends on the type of tooth being replaced and other necessary procedures. For example, a bone grafting or sinus lift procedure is often required to ensure that the jawbone is healthy enough to support the implant. This is an additional cost that must be factored into the overall treatment plan. Additionally, if the teeth being replaced are visible in the mouth (front teeth), it is usually more costly than replacing a back tooth.

Once the initial consultation has been completed and the detailed treatment plan has been prepared, a final cost estimate will be provided to the patient. This will include a breakdown of all the individual components of the dental implant including the implant, abutment, and crown.

Depending on the insurance provider and the policy coverage, some of these costs may be covered by the dental insurance. In addition, there are a number of healthcare financing options such as savings accounts, flexible spending arrangements, and even monthly payment plans that can help to make the dental implant cost more manageable.

The bottom line is that dental implants are a great value and they are the preferred tooth replacement option for most dentists, patients, and insurers. If you would like more information about the dental implant cost, please give us a call or schedule a free consultation online. We look forward to hearing from you!

Window Tinting For Your Car

Pro Window Tinting Wichita protects your car and passengers from the sun’s UV rays and reduces glare. It also helps preserve your leather upholstery and holds glass together in the event of an accident.

Window Tinting

Professional tinting is more expensive than DIY kits, but the results are well worth it. Professionals also offer a warranty in case your tint bubbles or peels.

Window tint protects you and your loved ones from the sun’s harmful UV rays, which have been known to cause skin cancer, light-sensitive migraine headaches and cataracts. Window Tinting can reduce up to 99% of these UV rays, and helps with interior temperature control as well by filtering out some of the sun’s heat.

Window Tinting also offers a level of privacy for homeowners. Many people don’t feel comfortable leaving their curtains open and letting everyone peer into their home. Window tint is an effective way to keep out unwanted onlookers and still enjoy the sunlight during the day.

For the best results, it’s recommended to choose a reputable installer for your home window tint. These professionals have the experience and knowledge required to get the job done properly, and will make sure that you’re happy with your tint for the long-term. In addition, a professional will ensure that the window tint is applied to your windows without bubbles or other defects that can detract from its appearance and performance.

The type of tint you choose will depend on your specific needs and budget. There are several options available, including dyed, metalized and carbon films. Dyed tints are typically less expensive, but can be susceptible to fading and may interfere with electronics like phone and radio signals. Metalized tints have a shiny appearance and offer excellent UV protection and reduced solar heat, but can be costly. Carbon tint is the most expensive, but it’s durable and offers superior fade resistance and heat rejection.

It’s important to know what your state laws require before purchasing window tint. Some states prohibit certain tint percentages, and others have regulations on the color and reflectivity of tint. Checking the laws in your area before getting window tint will help you avoid any legal issues down the road.

Window tint can add a sleek and modern look to your vehicle, and it’s also great for keeping the interior of your car cool during hot summer days. Tinted windows are also an attractive feature that can increase the value of your vehicle.

Heat Rejection

The specialized coatings in window tint block and scatter infrared radiation, reducing its transmission into your vehicle. This keeps the interior cool without sacrificing visibility and comfort. Tinting your windows also prevents harmful sunrays from fading your seats, steering wheel and other upholstery materials over time.

The best types of tints for heat rejection are ceramic tints, which feature a metallic layer that absorbs and disperses solar energy. This allows them to offer a higher TSER and IR rejection rating than other types of tint.

However, a high TSER rating doesn’t necessarily mean the tint is effective. It’s important to check the tint’s VLT, UV and IR rejection ratings together to see how well it blocks the sun’s heat.

Aside from reducing the sun’s rays, window tints can also help with privacy. They prevent people from peeking in through your windows and can keep burglars from attempting to climb or smash a window in order to break into your car, home or office.

Safety and security window tints are thicker than regular window films, making them harder to break or splinter. They can even hold shattered glass in place, protecting your family from injury should the window become cracked or broken by accident or natural disaster.

The glare caused by the sun can be distracting and cause headaches or eyestrain for drivers. Window tints reduce glare, making it easier to read maps or use your GPS while driving. Window tints can also help to keep your vehicle’s interior cooler, which can save on fuel and energy costs.

Window tints can be applied to almost any type of window, but it’s best to work with a professional installer. This is because the installation process can be tricky and requires special equipment to ensure a proper, long-lasting job. Window tint should always be installed in accordance with local laws and regulations, which can vary from city to city. Window tints can also void your window warranty, so it’s crucial to research the options available in your area and consult with a professional before installing them on your vehicle or home.

Appearance

When installed properly, window tinting will add a sleek, stylish appearance to your car. In addition, it can enhance the resale value of your car by adding a more luxurious look. Window tinting also offers a level of privacy by blocking visibility to passersby. In crowded neighborhoods this can be a useful tool to prevent thieves from targeting your car and its valuables.

Window tinting can be made in a variety of shades to suit your needs. For example, a 5 percent tint allows about half of visible light to pass through the window and is effective against UV rays. It also provides glare reduction and moderate heat control without sacrificing visibility.

A 35 percent tint offers a more subtle dark effect and provides moderate visibility and UV protection, while maintaining heat control and glare reduction. It is legal in most states and can be a good option for anyone seeking privacy but still wants a clear view of the road.

Metalized window tints use small metal particles embedded in layers of film to keep sunlight out. They are more durable than dyed tints and offer superior heat rejection. However, they are more expensive than dyed tints and may fade over time.

Carbon window tints are another premium option that offer improved durability and performance. This type of window tint has a clear finish and is more affordable than metalized tints.

Window tinting also increases the strength of your car’s windows, which can help protect you and your passengers from glass shattering in an accident. While it is impossible to completely eliminate the risk of glass breaking, tinting can significantly reduce the amount of shattered pieces that are dispersed throughout your vehicle.

Window tints with metallic components can interfere with radio, Wi-Fi, and Bluetooth signals. However, nano-ceramic window tints do not contain metallic components and are able to transmit all types of signals with crystal clear clarity.

Safety

A high-quality window tint can reject 99% of the sun’s harmful UV rays, protecting you and your family from skin damage over time. This UV protection can also help reduce fading to your car’s upholstery and dash, keeping it looking newer for longer. Additionally, tinting your windows can help keep glare to a minimum. This can make your commute much more comfortable by reducing the need to squint in order to see the road ahead of you.

In the event of a crash, window tint can significantly reduce the chance of passengers being ejected through the window. This is because the window tint can hold shattered glass together, preventing it from spraying in the face of passengers. It can also increase comfort by reducing the need for air conditioning in hot weather.

Window tint can also be an important tool for limiting the risk of skin cancer in people with medical conditions like photosensitivity or autoimmune disorders. The state recognizes this by allowing medical window tint exemptions, making it possible for individuals to drive with darker windows without being unfairly ticketed. It is important to work with a professional who can provide the proper film and installation for your unique medical condition to ensure that you receive maximum benefit from window tinting.

Burglars are less likely to break into your vehicle if they can’t see what is inside. Tinted windows prevent a potential burglar from seeing the contents of your vehicle, which can deter them from breaking in at all. Even if they do decide to break in, the tint will keep the broken glass from shattering into small pieces that could injure them.

In addition to reducing energy costs by keeping the interior cool, tint can also improve fuel efficiency by reducing the need to run the air conditioning. However, if the tint is not applied properly it can bubble and peel, reducing its effectiveness. Tinting a car does require some patience and attention to detail, but the rewards can be great. By selecting the right tint from a trusted and experienced service provider, you can enjoy the benefits of a cooler and more comfortable ride with increased privacy and security.