Cabinet Refinishing – A Cost-Effective and Quick Way to Modernize Your Cabinets

San Jose Cabinet Refinishing is a cost-effective and quick way to modernize your cabinets. For best results, avoid using harsh chemicals or abrasives on your cabinets, as these can damage the finish and cause discoloration.

Cabinet Refinishing

This method is less expensive and more environmentally friendly than replacing your existing cabinets. It also minimizes dust and mess, making it a safer option for the rest of your home.

Proper cabinet painting preparation ensures that your cabinets will receive a long-lasting, smooth finish. It is an important step that should not be skipped, as doing so may result in peeling paint or uneven surfaces. When properly completed, however, cabinet painting preparation results in a flawless makeover that you will love.

When preparing your cabinets for painting, the first step is to remove all hardware from your doors and drawers. This will allow you to work more efficiently and minimize any potential mess and damage. It is also a good idea to move any items that you want to keep out of the way to a different area of your home, such as a garage or a closet. This will prevent them from being affected by the painting process and prevent you from having to re-hang any pieces afterward.

After removing the hardware, you will need to clean the cabinets thoroughly with a degreaser and scuff sand any areas that are showing signs of wear. This will help the primer and later coats of paint to adhere correctly. It is also a good idea to purchase a special cabinet-grade primer, as it will be better able to withstand wear and tear than regular paint.

Next, you will need to sand the cabinet surfaces lightly to create a smooth, even surface. This will also help the new stain or paint to adhere properly. It is also a good idea to repair any scratches, dents, or blemishes at this point. Once the sanding is complete, you will need to apply a coat of primer to the cabinet surfaces. Let this dry completely before moving on to the staining or painting steps.

A cabinet refacing project is more extensive than a refinishing job, as it involves replacing the cabinet doors and drawer fronts while leaving the existing cabinet boxes intact. This is a great option if you are looking for a more drastic change in your kitchen’s look. However, if you are looking for a more cost-effective and less time-consuming solution, refinishing is the best choice.

Staining

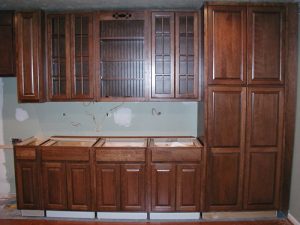
Cabinet refinishing is a great option for homeowners who want to upgrade their kitchen without spending the money to buy and install new cabinets. The process involves stripping the old cabinet doors and drawer fronts, repairing any damage, and staining them to give them a fresh look. Refinishing can be done on wood or engineered wood products such as medium-density fiberboard (MDF).

First, the cabinet surfaces must be cleaned to remove dirt and grease buildup. Mix a solution of trisodium phosphate (TSP) or a similar deep cleaner with degreasing properties in warm water and dip a clean cloth into it, then wipe down the cabinet surfaces, paying particular attention to areas near handles and knobs where grease tends to collect. Allow the surface to dry completely before proceeding.

Next, the cabinets must be sanded to prepare them for staining. Using 220-grit sandpaper on a sanding block, sand all flat surfaces of the cabinet doors and drawer fronts, as well as any textured or molded areas. Make sure to sand with the grain of the wood. Then vacuum the area to remove any sanding dust. After sanding, the cabinets should be lightly wiped down with a damp rag to remove any remaining debris.

Once the cabinets have been wiped down, apply one or more coats of stain to achieve the desired color and finish. It is important to apply the stain in even, thin layers, and allow it to dry between coats. Depending on the type of wood used and your preference, you may need to apply additional coats of stain to darken the finish.

When the stain is completely dry, it is a good idea to apply a polyurethane top coat to seal in the stain and protect it from normal wear and tear. It is important to follow the product instructions carefully, as the stain will likely need several hours to fully cure.

Refinishing your cabinets can be a challenging DIY project, but with proper preparation and practice it is possible to achieve professional-quality results. If you are unsure about how to tackle the project, consider working with a professional cabinet refinishing company instead. Not only will they save you time, but they will also ensure a high-quality finish that will last for years to come.

Painting

Cabinet painting is a great way to refresh your kitchen’s look and can even increase your home’s value. However, there are many steps involved in the process that must be taken carefully to ensure that your paint job looks good and lasts. A quality cabinet paint job requires proper surface preparation and a high-quality product. Without the right skills and knowledge, you may find yourself dealing with chipping or peeling paint in a short period of time.

A good starting point is to clean your cabinets with a degreaser such as TSP or another degreasing agent. This will help to remove any grease or grime that has built up on the surfaces of your cabinets, and can make a huge difference in the outcome of your cabinet painting project. After cleaning, it’s important to scuff sand the surfaces of your cabinets before priming. This will help to remove any sheen and prepare the surface for a smooth finish. After sanding, it’s important to wipe down the cabinets with a damp cloth to remove any dust and dirt from the surface.

Once the primer is applied, it’s a good idea to wait for it to dry completely before moving on to the actual painting. This will help to prevent any bleeding or flaking. Once the primer has dried, it’s a good idea to sand the cabinet surface again and wipe down any areas that are chipping or uneven. This will create a smooth surface for your paint and help to ensure that your paint adheres well.

After the cabinets are painted, it’s a good idea to allow them to dry completely before installing any hardware. This will help to prevent any damage or chips during the installation process. Finally, it’s a good idea to label your cabinet doors and drawer fronts before beginning the refinishing process. This will make it easier for you to return them to the correct place when the refinishing is complete.

Refinishing can be done as a DIY project, but it’s not an easy task and is best left to professionals who have the expertise to ensure a professional-looking result that will stand up to years of holiday feasts, family chaos, and weekday stress. If you’re considering updating your cabinets, contact us to see how we can transform your space.

Cleaning

Whether your cabinets are painted or stained, it’s important to regularly clean them. Over time, dust and grease accumulates on cabinet surfaces and can cause long-term damage if not removed properly. In addition, dirt and grime can clog scrubbing pads or scratch the finish of painted cabinets. Regular cleaning helps prevent these problems, making your cabinets look like new for years to come.

Avoid the Mistake of Using Harsh Cleaners

In an effort to remove stubborn stains or food residue, some homeowners may use too much pressure when scrubbing their cabinets. Aggressive scrubbing can damage the surface, leaving worn spots and scratches that can be difficult (if not impossible) to repair. Using a soft sponge and a mild dish soap diluted with water is usually sufficient for routine cleaning. For tougher stains, a paste made of baking soda and water can help break down grease without damaging the stain.

Some homeowners rely on wax- or silicone-based products to add shine and protect their cabinets. These products can actually cause long-term damage to your cabinets by attracting dust, allowing moisture to seep in, and creating an unsightly buildup on the cabinet’s surface. If you have been using these products, it’s important to remove them before starting your cabinet refinishing project.

Many homeowners also make the mistake of overusing caulking on their cabinets, which can leave a sticky residue and lead to mold or mildew growth. Caulking should be used sparingly and wiped down regularly with a damp cloth.

If you have white cabinets, it’s also a good idea to use a solution of one part white vinegar and two parts water to wipe down the surfaces. Vinegar is a natural cleaner and can help prevent the formation of mildew or mold.

Mold Removal – What You Need to Know

Mold is a common household problem that can be hard to eliminate. It grows as a fungus that thrives in moist conditions.

The spores you see are the fruiting bodies of this fungus. Luckily, by addressing the root cause, it is possible to kill the mold and prevent it from coming back. Contact Mold Removal In Brooklyn now!

Moisture is the key ingredient for mold growth, so you must fix whatever is causing it to clean up the problem. That can be as simple as fixing a leaking pipe or as complicated as tearing down and replacing walls, insulation, and flooring. It would be best if you also cleaned the affected areas and replaced any items that can’t be washed or re-used. A professional restoration service may be necessary if you have a serious mold problem.

Before you begin to clean, however, it’s important to protect yourself from the spores that are released during mold removal. The EPA recommends wearing rubber gloves, goggles and a mask that is labeled N95.

Once you have your protective gear on and have identified the source of moisture, it’s time to start cleaning the moldy area. Start by wiping the mold with a damp cloth or sponge. Rinse the cloth or sponge often and continue scrubbing until you can no longer see or smell the mold. Be sure to scrub porous surfaces like drywall and wood, as well as rugs and carpeting, to remove any hidden spores.

If the spores persist, spray them with a commercial mold killer such as chlorine bleach or distilled white vinegar, and wipe again. The acetic acid in the vinegar will kill the remaining mold spores and make it impossible for them to grow back.

After you have cleaned all the surfaces that can be safely cleaned, set out dehumidifiers and fans to dry the areas for three days. After that, test the area by sight and smell for any new mold growth. If you can’t find any, it’s safe to use your home again.

In many cases, a few splotches of surface mold can be a warning sign that there is an ongoing water or humidity problem that needs to be addressed. For severe mold problems, a professional remediation company should be used to ensure the fungus is completely removed and that the moisture issue has been resolved. They can repair any damaged areas and help you get your home or business back to normal as quickly as possible.

Cleaning the Surfaces

After a thorough inspection, the next step is to clean any areas where mold has grown. This process should always begin with removing the source of moisture, as well as addressing any building materials affected by the water intrusion or mold. Mold spores can also spread to other areas of the home, so addressing the root cause of the problem is important.

After the area has been cleaned, it is essential to thoroughly ventilate the space to avoid re-infection with mold spores. This can be done by opening windows and running fans. The use of a deodorizer can help to get rid of any musty odors caused by the mold growth. The last step is to replace any materials that have been permanently damaged or contaminated by the mold.

Depending on the type of mold you are dealing with, different cleaning methods may be necessary. For example, black mold (Stachybotrys) is typically very toxic and requires a professional to remove. This type of mold tends to grow in moist, dark areas, such as inside walls or under floors.

The best approach to cleaning mold is to remove any visible growth and resurface the area with a suitable coating, such as epoxy paint. This will prevent the mold from growing back and provide a healthy environment. For surfaces with stubborn stains, a mixture of vinegar and hydrogen peroxide can be used to effectively kill the mold and remove the stain.

When cleaning moldy surfaces, it is important to wear personal protective equipment, including a face mask with vent holes, rubber gloves and goggles. This will prevent any mold spores from getting in your eyes or on your skin, and it will also protect you from any burns or irritation from cleaning solutions.

For most areas, a good scrub brush, rubbing alcohol, water and detergent can be used to effectively clean the surface of any impacted areas. After scrubbing, it is important to rinse the surface and dry completely, as mold spores thrive in wet environments. It is also a good idea to wash your clothes and shoes after working in an area with mold, as they will likely carry the spores in and out of the house.

Cleaning the Air

Mold spores are everywhere in our homes and are constantly dispersed in the air. When we breathe in these spores, our lungs can absorb them, which causes allergies and other respiratory issues. For this reason, it’s important to remove all sources of mold spores from the environment, including those that have not yet grown into visible colonies.

Mold removal starts with identifying and removing the source of moisture that has allowed the mold to grow. Once that is done, the affected area can be cleaned and sanitized. When cleaning a moldy surface, it is important to use only non-toxic cleaners as some types of mold are toxic to humans. Non-toxic cleaners typically consist of white vinegar and water in a spray bottle or bucket. This mixture is sprayed or applied directly onto the moldy surface and scrubbed vigorously using a brush with a long handle. The contaminated surfaces should then be rinsed with clean water and thoroughly dried to prevent further mold growth.

Porous materials, such as drywall and ceiling tiles, should be discarded if they cannot be fully cleaned and disinfected. For these surfaces, it is essential to wear a mask, rubber gloves and goggles during the clean-up process to protect yourself from mold spores that may become airborne.

It is also a good idea to test an area of suspected mold to ensure it is actually mold and not mildew. This can be done by dipping a cotton swab in diluted bleach and swiping the area. If the spot lightens after a minute or two, it is likely that you are dealing with some form of mold and not mildew.

If you are concerned that your house has a problem with mold, you should consult an expert for a professional assessment and evaluation of the damage. If the extent of the mold is severe, it is best to call in a professional to avoid any further damage and to ensure the safety and health of your family and pets. Exposure to some types of mold, such as cladosporium and stachybotrys chartarum, can cause allergy symptoms like sneezing, coughing and shortness of breath in humans and can result in serious lung diseases in animals.

Final Inspection

Mold is a type of fungus that thrives in damp areas. It can be found in many places, including outside on grass clippings or on food in a refrigerator (such as green cheese). But it isn’t always harmless and may cause health problems, especially for those with certain allergies or compromised immune systems. There are even a few types of mold that are toxic. One such example is Stachybotrys chartarum, commonly called “toxic black mold.” Mold spores can trigger allergy and respiratory reactions. They can also irritate skin, trigger headaches, and cause memory loss and concentration problems.

The most important step in any mold remediation process is removing the mold and addressing the moisture problem that caused it to grow. If the underlying issue is not fixed, the mold will likely return and could continue to grow and destroy other surfaces.

Once the mold and spores are gone, a professional inspector will conduct a final inspection of the affected area. He or she will test the air to ensure the humidity level is back to normal. The professional will also check to see if the walls and floors are dry. If they are still wet, the professional will use dryers and fans to speed up the drying process.

Any contaminated items will be bagged, sealed, and disposed of in accordance with EPA standards. The inspector will then sanitize all surfaces with a bleach solution. He or she will wipe down the surfaces with a sanitizing brush and then sanitize the tools used to clean the surface with a disinfectant. This is a vital step, as touching or jostling the moldy surface can release more spores into the air and make the situation worse.

Once the surface is clean, construction services can begin to rebuild the area. Occupants should be informed of the mold problem and any construction that will take place in the space. Upon request, they should be given a copy of any inspection or testing reports. Once the space has been cleared for reconstruction, the mold restoration company can issue a certificate of clearance.

How to Get the Most Out of a Kitchen Remodel

Kitchen Remodel Tacoma can increase your home’s value and transform your space into the perfect cooking and entertaining area. However, these projects can be expensive and require a substantial investment of time.

Kitchen Remodel

Be realistic about your budget and include a contingency fund. Splurge strategically on the items that will have the most impact and cut costs where possible.

One of the biggest determining factors in a kitchen remodel is the budget. While some homeowners are tempted to spend more than they can afford in hopes of boosting their home value, this is rarely a wise financial decision. Generally speaking, kitchen upgrades that cost less than 10% of your home’s overall value offer the best return on investment.

Labor accounts for a huge chunk of kitchen remodeling costs, so it’s important to find a remodeler who is willing to work within your budget and help you cut expenses where possible. For example, painting your own cabinets, refacing existing ones or using particleboard instead of plywood where it won’t be seen can make a big difference in the final cost of a project.

Countertops are another major expense, and while granite is still the popular choice among many homeowners, there are more budget-friendly options like Corian, concrete or laminate. Flooring is also an important cost to consider. Vinyl, linoleum and laminate flooring is cheaper than hardwood or natural stone tile but still provides a modern look.

It’s also a good idea to leave at least 20% of your kitchen remodeling budget in reserve for unanticipated costs. You may encounter costly surprises such as plumbing or electrical issues that were not discovered prior to tearing out walls, or you might need to run water or electricity lines to an area of your kitchen that was previously not planned on.

Design

Once a budget is set and the scope of the remodel is determined (whether it’s a cosmetic makeover or a gut job), a design plan can be created. Designers offer many services, from simple sketches and computer-aided drafting to 3D animation and virtual reality. Some designers charge a flat fee, while others may include their designs in the cost of certain products, such as cabinets or appliances. Be sure to ask about these costs when interviewing professionals.

A mid-size kitchen remodel usually starts with demolition, or “demo,” which exposes the walls and subfloor, allowing for utility work like new drywall and changes to plumbing and electrical circuitry (if necessary). Next, framing changes are made, including adding windows, moving or removing walls and possibly extending ductwork.

When the wall structure is ready, the installation of cabinets and countertops begins. Depending on the size of the room, this can be a major undertaking that requires heavy equipment and professional help.

This is also the time to decide on the materials for the kitchen. Countertops are an expensive element, and choosing a material that is not only durable but that fits with the design can be a difficult choice. For example, a bold backsplash can be fun, but it may not work with a tile floor or with your paint color scheme. Keeping it in mind will ensure that your remodel looks cohesive and intentional.

Layout

The layout of your kitchen is a vital part of a successful remodel. You want to be sure it is functional and fits the needs of your family. A good designer or contractor will be able to assess your current space and advise you on whether it is working well or can be improved by changing the layout.

There are a number of different layouts to choose from, including galley kitchen designs, L-shaped kitchens and U-shaped designs with a peninsula. Each has its pros and cons. You also need to take into consideration natural light. For example, if you have windows in your kitchen you need to be sure that they are properly placed to maximize light and allow for the best workflow.

Another factor that influences the layout of your kitchen is how it will be used. Your designer can help you decide which layout will be most appropriate for your family’s unique lifestyle and work habits. This will involve examining how your family uses the kitchen, such as who cooks most often, does anyone entertain in the home and if there are any members of the family with special needs that may require adaptations.

A fresh kitchen layout can make a huge difference to the way your kitchen works. It can prevent tripping hazards and improve workflow. The goal is to create a practical, functional space that meets your family’s needs and fits seamlessly with the rest of your home design.

Materials

When it comes to kitchen remodels, the materials you choose will have a huge impact on your project’s success. It’s important to consider all your options and budget carefully when choosing cabinets, sinks, countertops and backsplashes, floors, lighting, and appliances.

Cabinetry is a big part of the total cost, and it’s critical to choose durable materials that will stand up to moisture and daily wear and tear. For example, plywood resists water effectively and is easy to repair if damage occurs. However, it may not be as attractive as solid wood.

Countertops are another major investment, and it’s worth focusing on quality to get the most value out of your dollar. Look for granite or quartz that will withstand stains, acidic liquids and everyday wear and tear. Other natural stone materials like slate, travertine and limestone are also gaining popularity. If you’re on a tighter budget, try a poured concrete countertop that can be customized to fit your space or a more affordable porcelain option.

Backsplashes are a great way to add a splash of color or texture to your kitchen, and they’re also an effective way to protect the walls from grease and grime. They can also be used to create a custom design element, such as a unique pattern or a backsplash that incorporates the same material as your countertop. Also, don’t forget to consider energy-efficient appliances that can help lower your utility costs.

Appliances

A new kitchen can transform the heart of your home and make it a place you want to spend time in. Often a remodel includes new appliances, but it can also include changes to the layout and organizational changes. The appliances you select can significantly impact your remodeling costs. Some of the factors you will be weighing when choosing appliances include energy efficiency, quality, price and warranty. If you’re planning on purchasing a new refrigerator, dishwasher, cooktop or oven, it is best to start shopping early in the remodeling process.

Kitchen remodeling can be a great opportunity to upgrade your appliances to more eco-friendly models. While these devices may be pricier upfront, they offer long-term savings in energy bills. Another option is to consider using sustainable materials for your flooring, cabinets or countertops. These options will add value to your home and attract homebuyers if you decide to sell it in the future.

Choosing the right appliances for your remodeled kitchen can be challenging. You will need to decide on a design, color and style that fits your aesthetic. You can find a variety of different styles, colors and sizes of kitchen appliances online or at a local store. It is recommended to consult a Kowalske designer, who can show you the most popular products and colors. In addition, you will need to consider the size of your kitchen, the amount of storage space and the electrical requirements of your appliances.

Financing

A kitchen remodel can require significant financial investment. Depending on the scope of your project, it can range from what Ariana Lovato calls a “basic cosmetic refresh” to a complete overhaul that involves tearing down walls and reconfiguring the layout (which may necessitate permits).

To determine the best financing options for your kitchen renovation, consider the total cost of the project, how long you intend to finance the loan, and the repayment schedule. It’s important to keep in mind that credit cards limit you to a maximum lending amount, and carrying a balance may incur costly interest or annual fees. In addition, credit card debt can affect your credit score, so you’ll want to make sure that you select an affordable borrowing option that will allow you to repay the loan over time.

Personal loans and home equity loans/lines of credit are more flexible options. They typically have lower interest rates than credit cards, and they can be used for any type of improvement project. However, they are secured by your home, so you’ll need to have sufficient equity to qualify and you may be required to have cash on hand for closing expenses.

Finally, several government programs offer loans or grants for homeowners who are remodeling their homes. These typically come with strict eligibility requirements, and they can be more time consuming to apply for. Once you’ve decided how to finance your kitchen renovation, prepare any necessary documentation and submit your application.

Choosing Colors for Your Bathroom Remodel

Bathroom Remodel Near Me is a major undertaking. Depending on how extensive the changes are, hiring a renovation specialist can ease some of the stress and costs.

Bathroom Remodel

Ensure a safe and accessible bathing space by installing grab bars, non-slip flooring and walk-in tubs during your remodel. Also consider adding stylish accents like mirrors and decor for a finished look.

Contemporary bathroom design is defined by sleek lines and natural materials that evoke an air of luxury. While the style may showcase some of today’s most up-to-date trends, it typically focuses on timeless, sophisticated features that will remain relevant for years to come. This balancing act is perfect for homeowners who wish to stay current with the latest trends while still embracing a clean, classic aesthetic.

White’s inherent purity lends itself well to modern bathroom design, establishing a fresh and open atmosphere that feels clean and spacious. This color also pairs beautifully with a wide range of materials and finishes, from gilded fixtures to natural stone countertops. The neutral palette is especially striking when combined with a variety of tile styles that create dynamic visuals, such as herringbone patterns or hexagonal motifs.

When choosing bathroom vanities, mirrors, lights, and other fixtures, look for sleek, elegant pieces without ornate detailing. Keeping sightlines open will help your modern bathroom feel more open and spacious, while ensuring that the space isn’t hindered by bulky hardware or other accessories.

Using different types of marble tiles to create unique designs is an easy way to keep your bathroom feeling contemporary. Here, a patterned accent wall and floor-to-ceiling marble shower tiles give this bathroom a unique, custom look that elevates the overall design without overwhelming it with unnecessary detail.

White

White bathrooms are clean, crisp, and fresh. The neutral palette lends itself to a variety of design styles, and it’s easy to add warmth with a few well-placed accent colors. Black is a popular option because it’s timeless and classic, but other colors like warm grays and soft blues can also work to create an invigorating bathroom space.

In addition to color, white bathrooms can benefit from texture. Mixing tile shapes and sizes, incorporating a wood vanity, or adding woven storage baskets can help break up an otherwise flat and monotonous space. Incorporating a window shelf is another great way to add a natural element without breaking the white palette. This is a perfect place to display greenery, houseplants, flowers, or other decorative items that can refresh your bathroom when you need a change.

A bathroom remodel is an excellent opportunity to make your home more comfortable and to enhance its value. Contact a remodeling company that provides a one-day remodel and ask how they can help you achieve the perfect bathroom. Blue Ridge Cabinet Connection offers customizable cabinet furniture to fit any size bathroom and can offer suggestions for storage solutions that will help you make the most of your space. They can also provide a free quote for the services you need. They are a local, family-owned and operated business in western North Carolina. For more information visit their website.

Forest Green

Green is a relaxing color that brings you back to nature and feels fresh. It’s also a great hue for bathrooms because of its soothing qualities. It can add a sense of calmness to your space and make it feel like a sanctuary at the end of a long day.

A dark forest green bathroom exudes a sense of tranquility and sophistication. The shade creates a warm, cozy atmosphere and is a perfect backdrop for gold fixtures and natural wood elements. It’s a great choice for master baths and powder rooms alike.

For a more subtle look, opt for light green walls. They’re a breath of fresh air and pair well with a wide range of colors. Light green bathroom walls are especially effective in smaller bathrooms because they prevent the walls from feeling too flat. If you choose a mint or sea-inspired hue, team them with shapely trad-style sanitary ware for a bold contrast.

If you’re in the mood for a more vibrant hue, try yellow-green wallpaper or paint your entire room a bright grassy shade. You can also add green accents, such as a soap dispenser or floor mat, to enhance your bathroom’s color scheme. These simple touches will help tie your bathroom design together and make it feel complete and cohesive. Alternatively, you can use a darker shade of green for an accent wall or a patterned tile.

Rock-Filled Floors

River rock and pebble decors are an elegant addition to bathrooms, adding a natural touch that can make the space feel calm. These styles are highly durable and aesthetically appealing, promising long-lasting beauty. They’re also water-resistant and don’t easily get damaged by humidity. However, these styles are not the easiest to maintain, requiring regular cleaning to remove dirt and grit. Additionally, they aren’t the cheapest option for bathroom flooring, with material and installation costing more than traditional tiles.

When used for bathroom floors, river rocks create a textured surface that is comfortable to walk on. However, they’re not ideal for all locations since the rocks might obstruct drainage and cause pooling if located outdoors. If you’re considering this option for your bathroom, consider incorporating a weed barrier underlayment to prevent invasive plants from sprouting between the rocks.

While it might sound tempting to go all-out with a rocky look, it’s important to keep in mind the challenges of using natural rock as bathroom flooring. While ceramic tiles designed for bathrooms are made with porosity in mind and undergo rigorous testing to achieve a texture that isn’t slippery when wet, it’s much harder to guarantee the same result from natural stone that’s not as refined. For this reason, it’s best to limit the use of river rock or pebbles in your bathroom to smaller accent pieces like a pebble backsplash or bathmat.

Mirrored

The mirror is a key part of many bathroom designs because it helps to make rooms appear larger, brighter and more spacious. It’s also a great place to add some flair and personality to your bathroom, especially with frame options that add decorative accents to the space without taking away from its functionality.

Decorative frames can work well with many decor styles, and they’re especially suited for bathroom vanity design ideas. For example, this brushed nickel mirror from MullerDesignsCA features a transitional design that fits with modern and traditional style decor. Its beveled glass construction enhances its luxurious allure, and its curved shape complements the lines of this elegant vanity.

If you prefer to keep your bathroom decor minimalist, a frameless mirror is the way to go. This style emphasizes your walls’ neutral color palette and provides a clean and modern look. It’s also easy to customize the look by using different mounting methods, like the simple bracket shown here.

Another option is to incorporate a tiled ‘frame’ around your mirror, which can also provide extra storage space for toiletries. It’s a fun and creative way to add some personal style to your bathroom, while also keeping items out of the reach of children.

Customizable storage solutions can also help you create a harmonious and efficient shared bathroom experience for multiple people. Consider installing medicine cabinets with adjustable shelves, personalized design elements or even multi-functional mirrors with storage built in.

Purple

Most bathrooms are surprisingly plain when it comes to decor, but that doesn’t mean they have to be. Adding a pop of color can dramatically improve the aesthetic and make your bathroom stand out from the rest. Whether you want to create an entire purple theme or just add an accent wall, there are plenty of unique and eye-catching ways to incorporate this vibrant shade.

One of the easiest ways to try out purple is through linens like towels, bath mats and shower curtains. This is a non-committal way to introduce the color into your bathroom, and it can be easily changed out when you want to switch up the look.

You can also create a modern and sleek bathroom by pairing a flat purple shade, such as Farrow & Ball’s Brassica, with black tiling and contemporarily designed plumbing fixtures. Green is also a natural complementary color to some shades of purple, particularly emerald, so try mixing in touches of this hue for an extra pop of color.

Finally, if you’re looking to make a bold statement, try a dark purple color, such as Eggplant by Benjamin Moore, in your bathroom. This rich, deep shade is perfect for vintage-inspired bathrooms and looks great against a black tile backsplash or floors. Incorporate gold finishes into your design for a luxurious and glamorous finish to your purple bathroom remodel.